Understanding how an intrauterine device (IUD) is inserted can make the process far less intimidating. As a women’s health nurse practitioner, I’ve guided many patients through this simple yet precise procedure. Let’s go through how IUD placement works, what diagrams show, and what to expect before and after.
What Is an IUD and How Does It Work?
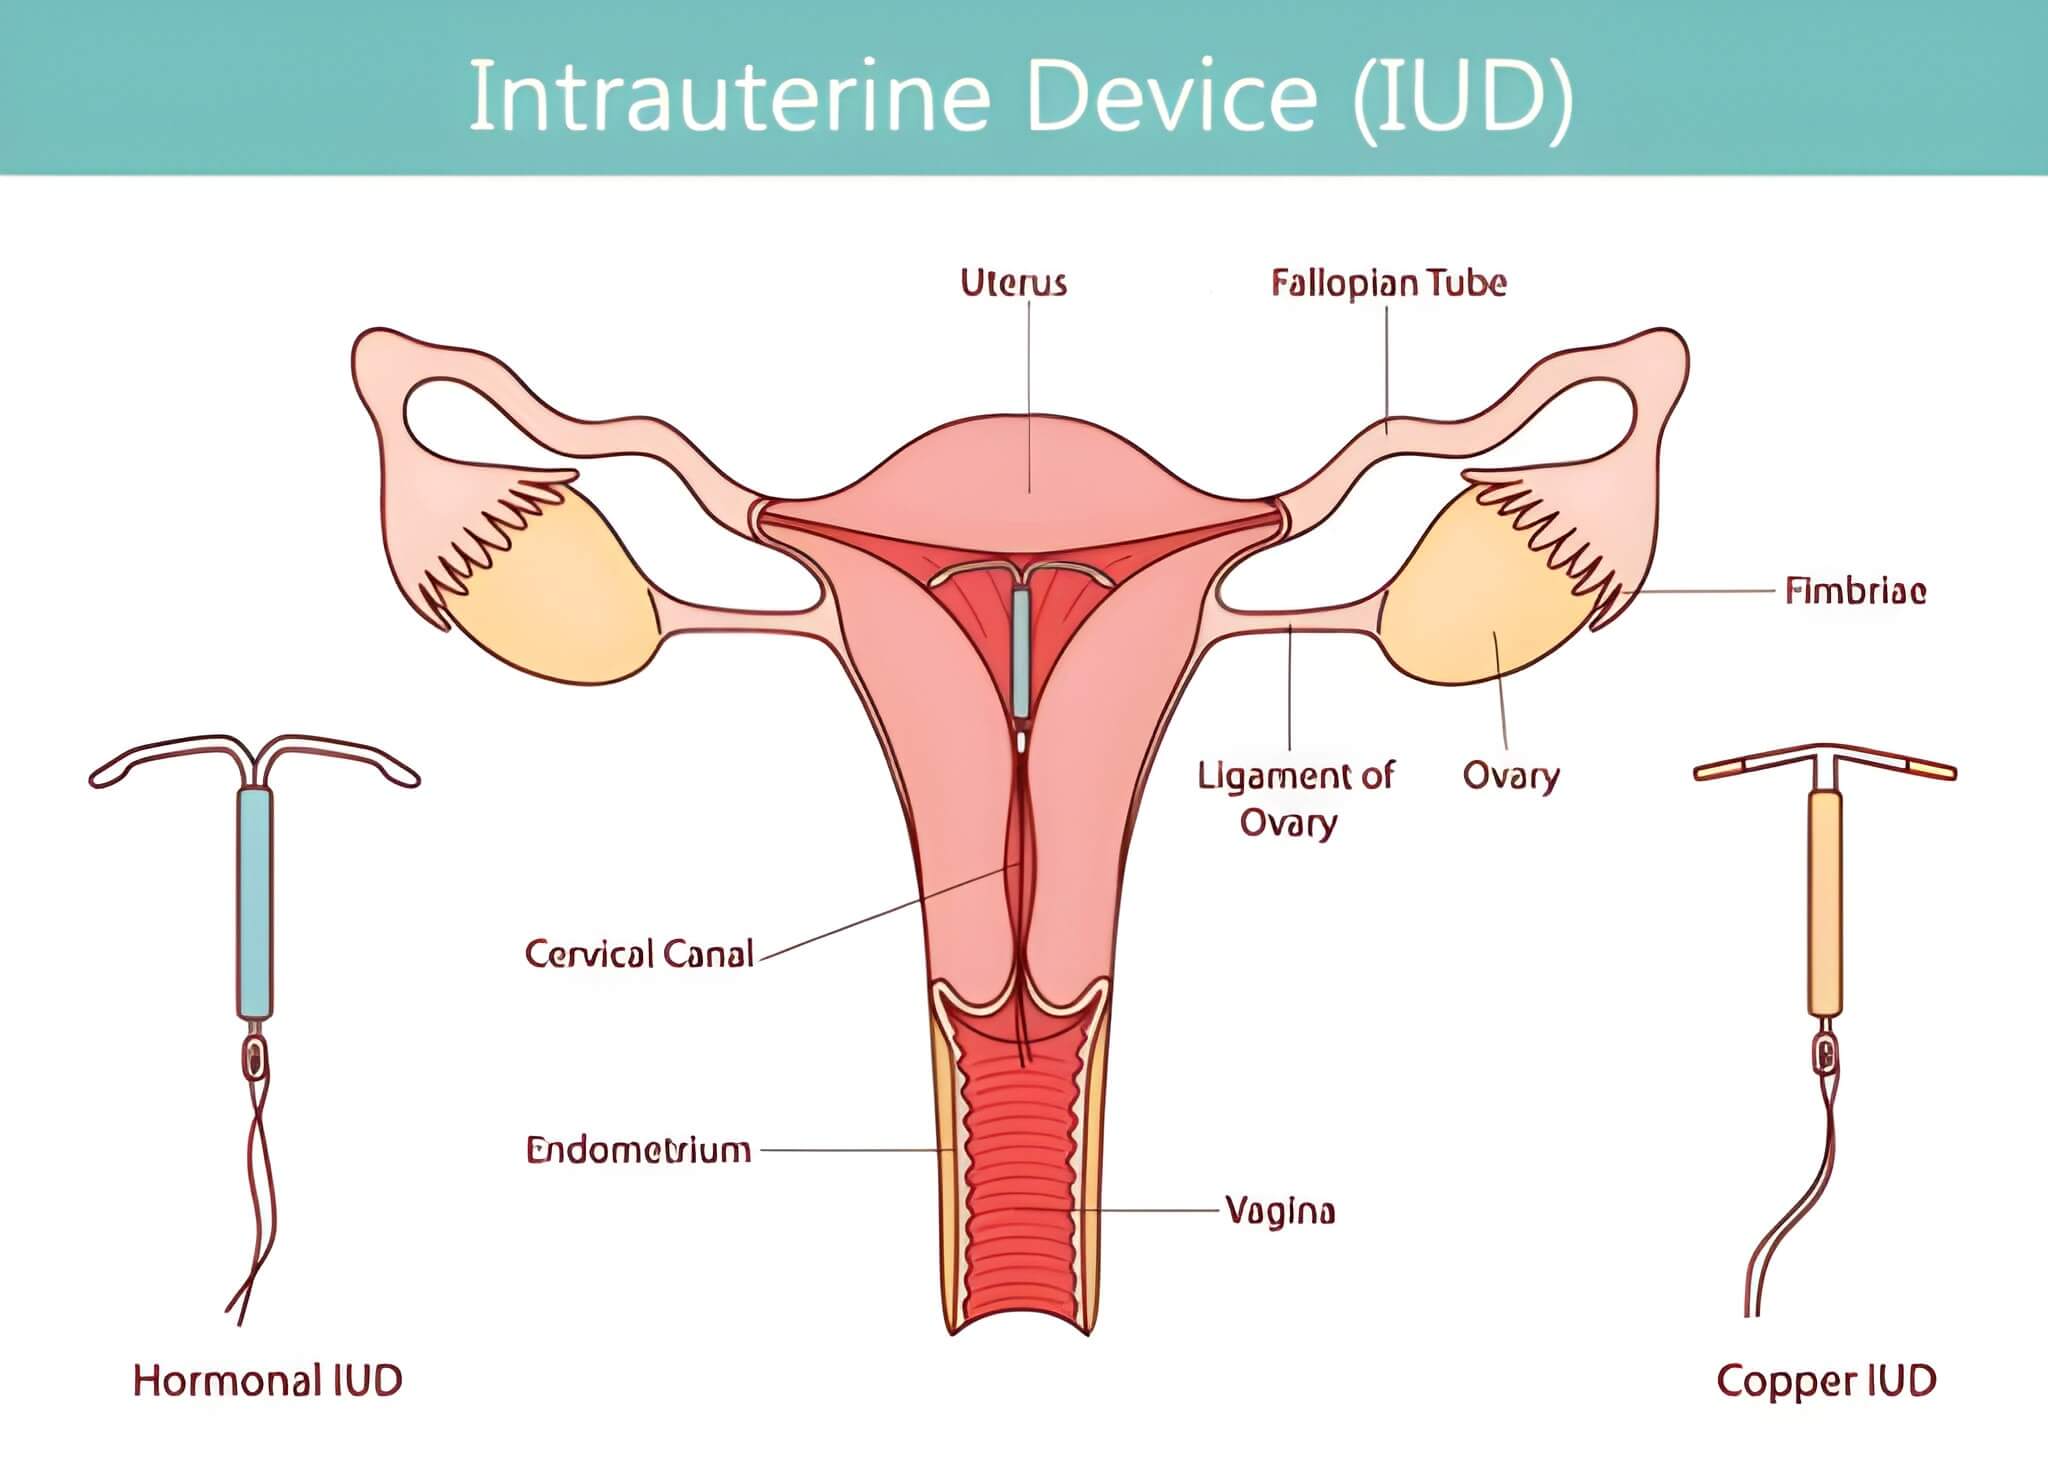
An intrauterine device (IUD) is a small, T-shaped piece of plastic or metal that is inserted into the uterus to prevent pregnancy. Depending on the type, it releases either hormones (like Mirena) or copper to block sperm from fertilizing an egg.
IUDs are over 99% effective and can last from 3 to 10 years depending on the brand.
The IUD Insertion Procedure Explained
IUD insertion is a quick, outpatient procedure that usually takes only a few minutes. Below is a clear, step-by-step look at what happens, similar to what’s shown in an IUD insertion diagram or medical illustration.
Step 1: Preparation
-
You’ll lie on an exam table, just like during a Pap smear.
-
Your provider uses a speculum to gently open the vaginal canal.
-
The cervix is cleaned with an antiseptic solution.
Step 2: Measuring the Uterus
-
A thin instrument called a sound measures the length and position of your uterus.
-
This ensures proper IUD placement and helps prevent discomfort or expulsion later.
Step 3: IUD Insertion
-
The IUD comes folded inside a small tube-like inserter.
-
Your provider gently inserts this tube through your cervix and into your uterus.
-
Once in place, the IUD arms open into a “T” shape.
-
The inserter is removed, and the strings are trimmed to about 2–3 cm.
This step-by-step process is often shown in IUD insertion diagrams and videos to help visualize the anatomy and placement.
How Do IUD Placements Look?
In most IUD placement diagrams, you’ll see:
-
The uterus is a pear-shaped organ.
-
The IUD sits in the upper part (fundus) of the uterus.
-
Two thin strings hanging slightly into the vaginal canal for future removal.
If you search for “IUD placement diagram” or “Mirena insertion video,” you’ll find visual guides that match this description. These visuals help patients understand where the IUD sits and how it functions.
Position of IUD: What’s Considered Correct Placement?
A correctly placed IUD:
-
Rests at the top of the uterus (fundus)
-
It is centered in the uterine cavity
-
Has strings visible at the cervix
If an ultrasound or follow-up check shows the IUD is too low or tilted, your provider might recommend repositioning or reinsertion.
Common Sensations During IUD Insertion
It’s completely normal to feel:
-
Mild cramping during insertion
-
A sensation of pressure in the pelvis
-
Light spotting for a few days afterward
To ease discomfort, many providers suggest taking ibuprofen an hour before your appointment.
IUD Insertion Videos and Educational Resources
If you’re a visual learner, watching a Mirena IUD placement video or IUD insertion diagram animation can be very helpful. These educational visuals—used in clinics and training programs—show:
-
Each insertion step
-
Correct device orientation
-
Patient positioning and uterine anatomy
While videos can be informative, always rely on your healthcare provider for personalized guidance rather than online demonstrations alone.
IUD Contraindications: Who Should Avoid IUDs?
Not everyone is a good candidate for an IUD.
Below are intrauterine device contraindications your provider will consider:
-
Current pelvic infection or untreated STI
-
Known or suspected pregnancy
-
Unexplained vaginal bleeding
-
Uterine abnormalities (fibroids or congenital shape issues)
-
Copper allergy or Wilson’s disease (for copper IUDs)
-
Breast cancer (for hormonal IUDs)
If any of these apply, your provider may recommend another birth control method.
After IUD Placement: What to Expect
Once your IUD is in place:
-
You may feel mild cramps or spotting for a few days.
-
Avoid inserting anything into the vagina (like tampons or menstrual cups) for 24–48 hours.
-
Check for your IUD strings monthly after your period.
-
Schedule a follow-up visit within 4–6 weeks to confirm the device is correctly positioned.
IUD Insertion Procedure Steps (Summary)
To summarize, here are the key IUD insertion steps:
-
Clean the cervix and insert the speculum
-
Measure uterine depth
-
Insert the IUD using a sterile inserter
-
Deploy and position the IUD
-
Trim the strings
-
Confirm placement with pelvic exam or ultrasound
Why Proper IUD Placement Matters
A well-placed IUD ensures:
-
Maximum contraceptive effectiveness
-
Minimal cramping or bleeding
-
Lower risk of expulsion or perforation
Incorrect placement can cause discomfort, irregular bleeding, or failure of the device.
Frequently Asked Questions
Can I see my IUD placement on an ultrasound?
Yes, your provider can confirm correct positioning with an ultrasound.
Can I feel my IUD inside?
You should only feel the strings, not the IUD itself.
What if I can’t find the strings?
Schedule a visit to your provider—sometimes strings curl up inside, or the IUD may have shifted.
Is the Mirena insertion video accurate to real life?
Most educational Mirena insertion videos follow real clinical steps, though pain levels vary by person.
Final Thoughts
IUDs are a safe, long-term, and reversible form of birth control. Understanding how the IUD insertion procedure works—and reviewing IUD placement diagrams—can help reduce anxiety and empower your decision-making.
If you’re considering an IUD or want to confirm placement, schedule a consultation with your healthcare provider.
Disclaimer: This is informational content, not a substitute for professional medical advice.

Meghan Killilea Galli, APRN, FNP-BC, is a board-certified Family Nurse Practitioner based in Connecticut with over 5 years of clinical experience in urology, women’s pelvic health, and primary care. She currently practices with Hartford HealthCare and Griffin Faculty Practice Plan, where she provides evidence-based, patient-centered care. Meghan founded Health Gardeners to make reliable health information accessible for Hartford residents and beyond. Read More ![]()